Showing posts with label Barn Upgrades. Show all posts

Friday, January 27, 2012

Goat Stall

A.k.a. FINALLY! Can be a little hard to pin-down the maintenance guy around here. So we start with the stuff that really really needs to get done before we move onto the stuff the neeeeds to get done. This neeeeeded to get done.

Harry isn't nearly as impressed
as I am

And now it is!

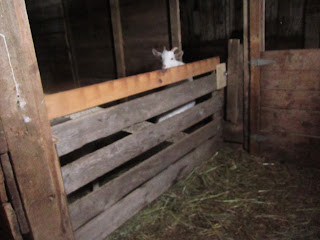
Taa-daa the goats finally have their own stall!
But I want to chew your boots
and nibble your pockets!


Now, it's not perfect, but it's very functional for right now; and I actually like that door swings in because I can retrieve the water bucket without loosing all the goats with it!

Billy is less upset
For now Billy is left to roam around the hallway - he can go chat with Hare & Di over the fence if he wants, but he's just happy to get away from Yankey (who still hates him).
Looks like she's back in heat again

Eventually we'll be turning the stall beside the pig's stall into the Billy's own stall, (and then a nursery for Yank's kids - if she has any). 


The future site of the Billy stall

Wednesday, January 11, 2012

Coop Upgrade

I am a new feathers wearing!
 Some of the red stars have started to re-grow their feathers and I'm so glad! It means we're getting less eggs (although there is at least a dozen dozen in my fridge...) but I'm really happy to see the girls looking less straggly! You can see all her new feathers along her breast, there is a colour difference because the new feathers aren't fully formed yet.
Turkey pissed off the wrong Rooster!
 Someone got back at Tom here for going after the chicks...

Finally!
 We got the former feed area of the coop fixed up at the top so the birds can't hop over the barrier any more. It's too bad because that is their favourite spot to roost, but also means I can keep the turkey completely separate at night.
They aren't too impressed with me

Which also means the chicks can
go back out to the coop!
They remember where the food is!
 Fully feathered, they're all out in the coop again, and seem to be doing very well. It's possible there is 1 hen in the bunch, but looks like a big batch of roosters. We'll be keeping Lenny's baby (the b&w on the right) and I'd like to keep the "raven" on the farthest left, if our other chick is a girl... well, looks like we'll  continue to have some very pretty chicks.


EE#1's nest got broken into again!

What she's supposed to be sitting on
 Not sure eggs in January is the best plan (eggs in November was a bit dicey!) but she's determined & I'll probably pull the chicks to raise them in the house as soon as they're hatched.

Good luck EE #3!
 Muscovy eggs take 31 days to hatch, chickens about 21 days. So there is little hope I can actually get her to sit on those eggs for the full hatch period, but there is no harm in trying.

Wednesday, January 4, 2012

Water, Plan B

A.k.a. What I should have done in the first place!!!

After having to haul about 20 pairs of buckets Christmas Eve to the water trough in the paddock, I was starting to question why I wanted to leave the tank where it was. Although still being filled by snow melt and the occasional rain-storms we're still getting, it was proving to be a huge PITA to get water into especially since my hose is hopelessly frozen into the ground. Also we had a huge long extension cord run across the yard to keep the de-icer plugged in.

I should mention after our first snow storm the horses or cows knocked down the electric separating their paddocks so they're all together again (and happier for it; I caught them all having a big nap in the hay today, one big happy herd!)

Sometimes you need a day or two away from a problem to get your head on straight, and so Plan B... 


DUH!!! We move the water trough to the back of barn where it is 10' from the water connector in the cow-section of the barn and 10' from an electrical outlet!! There is even a connection here with a switch where the old automatic water tank (sadly rusted out!) was plugged in. We don't need the switch because the de-icer has thermostat.

Now I only need to thaw out a 10' hose when it freezes despite being emptied out (in fact I'm storing it in the shop). If I can't get the hose running I only need to move buckets 10'. While the pump in the yard is a frost-free, the handle has still frozen down a few times with all the freezing rain we've been getting. The tap in the cow-section has heat tape on it & not only doesn't freeze, the water coming out that's stored in the tap is just warm enough to melt off anything on the top of the hose too.

Can we have summer back?


Monday, December 19, 2011

Cook: Beef Jerky

Jerky's in the oven!
 Long story short, I had some top sirloin steaks de-frosted that were very lean, too lean. So they're sitting in the fridge while I try to wrack my brains about what to do with them. Right when I'm thinking I'll marinate over-night and bbq the next day, I think, marinate, what else have I marinated meat for? JERKY!! I haven't done this since the last time we bought a 1/4, and it's been awhile.

Now, I'm no expert, AT ALL, in fact this is the 3rd time I've ever made it. We were given the smoker by my lovely in-laws because they don't use it very much in GTA Toronto. The first attempt at jerky was a nasty salty disaster, the second was a little better, this time I think I've done it!

If I could change the name of this
vaguely racist product I would....

I used a really simple salt, sugar & water recipe for the marinade. I've got to reduce the salt again for next time, or just remember to rinse off the meat before smoking... which I always forget.

I know there is a little bag of hickory chips floating around the house somewhere, but unable to find it & unwilling to drag the kids out to Walmart, I improvised. Using just hardwood firewood we already had, I got a better smoke, and even though we don't have the flavour, the jerky is great! Maybe for next time I can just buy a log of hickory or something?

So I'm feeling a little more adventurous now, perhaps even enough to try smoking salmon again, or even a whole chicken! Stay tuned for further smoker developments...

Friday, December 16, 2011

Coop Upgrade/Date Night on the Farm

Yeah date night now consists of catching up on farm chores together, it's very romantic.

Anyway, the chickens finally have a night roost! It's a little lower then I was planning, but the chickens seem to love it & I think this might work out better anyway.

It's 89" wide, the same as the back of the coop, about 2' tall & high (maybe a little less).

So no more pooping in the nest boxes, hopefully! Instead they can all sleep on the roosts here, and be able to get up high enough to sleep on the backwall (which none of them do).

Friday, November 11, 2011

Scrap Bin!

Friday Project:

Is to fill the scrap bin with all this garbage and get it off the farm!

So no time for crafting this week (plus I still have my hot water bottle cover to do, no time so it's going really slowly).

Instead I have pictures:
Steak wants back in with mom.
The electric was not hard to re-string
but they've cracked some boards.


Good thing we decided we wanted to replace all this fencing next year anyway! Not sure what I want to do, but I'm thinking post & board.

We've got some major re-thinking of the pastures to do anyway. Originally we were going to do one big paddock, but now thinking that is silly because it is SO much cheaper to do one paddock for small animals (chickens/etc.) on small fencing and use cow-fencing for the pigs pasture.


I can't believe it but we ran out of feed bins! I thought we'd bought way too many, but with the addition of the pot-bellies and new turkeys we don't have enough any more. 

Horses: Fat 'n Fibre & Sweetfeed*
*(sweetfeed need to be tosses out as it's old & I'll use this for something else until fatty looses some weight)
Chickens: Layer & Chick starter
Then we have Beef feed (which we don't use often), Pot Belly Pig food, Cracked Corn & Turkey feed.

The feed room is metal-lined so we shouldn't have a mouse problem, but they are still getting in somehow, so I had to store the bags of feed in the car overnight!

Not getting any sweetfeed
At least she'll be warm over winter...
Maddie, that is the most attractive pose EVER!

He was in the ditch hiding from Fatty while he ate his dinner. He's getting nice and fleshed out now (following Meg's diet plan I guess!) I've actually had to cut his food right back!

Thursday, October 13, 2011

To each their own, stall.


 Whether you want to use straw or shavings depends on a number of factors, the first of which is probably cost. For various reasons, pine shaving prices have been going through the roof lately! Although shavings are the cleanest, easiest to manage, and nicest smelling for horses; there are lots of reasons why you might want to pick straw instead.

One of which is a horse who likes to churn up his stall. Maddie has a little trouble settling down at night, this isn't overly surprising, I've found the same with most "hot" blooded horses. As a result his stall become a miserable mess of manure and shavings. Either we can go through bags & bags of shavings and his stall will always be a mess, or you switch him to straw. I'm using the dry, chopped old straw from the loft in his stall. Every night that he stays in there, I'll go in and pick out any stray poops, and add some more fluffy straw to the top. This gives him a lovely warm bed to lie in, and I don't have to toss out half a stall of shavings every day.

Maddie's Domain
Plus once it's time to clean out the whole stall it goes straight out to the manure pile in a glorious steaming heat of near-compost!


Meg is the complete opposite, she is very tidy, and although she frequently lies in it (oh the joys of light coloured horses!!) she rarely steps in her manure. So for her we have shavings over mats, I can easily pick up the few poops; and every day I move the dirtiest shavings into her "pee spot". I've also swept back the front to keep her hay clean when she eats, I do the same thing for Maddie's stall.

Meg's Home
The horses are rarely in for very long, we've got the liberty of keeping them out as much as possible. Both healthier for the horses, and less money and work for me!


Sunday, October 9, 2011

Oops - Down goes the fence.

 Tee-hee... my bad.

Hit the fence right by the gate with the trailer on the ATV, going too fast trying to get something done, I took the entire fence out. The fence here was in bad shape and we've got big plans to fix it up, next year.

Thankfully hubby was home, and didn't mind (too much) repairing the fence.


Much sturdier! Not thrilled about the metal posts but the animals rarely go through this gate anyway. Plus we don't have to worry about it coming down in a snow storm, the whole thing is much stronger. 

And I've promised to drive more slowly and carefully...


Wednesday, September 28, 2011

That's it for the tree!


Hubby got the big dead tree in the paddock cut down, we took most of it for wood for the house but there was some of it that just wasn't a good size plus we had some old fence posts out here that had to go!

Diego & Harry "helping"
The whole pasture is really coming together. The grass has been cropped really short in some spots, but there are other spots that still have enough for the animals to browse on. The goats have done an amazing job getting the weeds down all over the place. Can't wait to get the new fences in next year (I hope!).


The pastures should come back beautifully as long as we keep the animals off them early spring, with all the drainage I'm not that worried about soggy fields but we'll have to see! With all the nitrogen the grass has gotten this year, plus if we can rotate the fields, we'll be sitting pretty for sure.

Wednesday, September 21, 2011

Bye Bye Manure Machine


Hey there is something missing here!!


This dangerous, no longer useful apparatus is completely out of the pasture! I'm so glad too, I was really worried about Maddie hitting his head off it one day, especially as they are coming into the barn past it now.

There is tons of delicious composted manure underneath the machine. For whatever reason, the land all around the manure machine is very poor, compared to the rest of our pasture which is very rich. There is lots of clover, showing poor nitrogen in the soil, and the soil is very hard and compact. May be there is a high sand or clay deposit here under the soil compared to the rest of the pasture. Either way, it means I've been breaking my back spreading all the black gold from under the old machine out all around it, which the chickens are very happy about.

Hubby had to slice the whole thing apart with the chain saw so we can get it out of the field. It took us about 3 hours start to finish with the boy's help. I definitely feel I can sleep better at night knowing this is gone! One more off the T.D.B.W. (To be done before winter) list!!

Although it's a neat piece of old farm machinery, even if this had been in good condition I wouldn't have wanted to keep it. It took up a large part of the pasture, and it was dangerous for the horses. There is still a large section in the cow part that we haven't removed yet & that dump cart itself. 

Tuesday, September 20, 2011

Paddocks to Pasture & Poor Megs

Poor Megs!
Just took off the skin so it's really superficial
but it could have been a lot worse if she had
gotten really tangled
 What was that I was saying about doing today what you can put off until tomorrow? Especially when it comes to fencing... We had a funny summer, couple dry periods but when it rained it poured! And all that water sitting in the ditch really compromised the dividing fence, so it was falling down & getting looser and looser.

I had it on my T.D.B.W. (to do before winter) list, but apparently I didn't get around to it soon enough.

You can see bits of her hair are still on
the fence
It didn't take too much to find out where she'd gone through the fence. Right beside the feed bucket, so she probably aimed an air-kick (she rarely actually kicks other animals, but she likes to show off) at someone and missed.

 So, I push aside other things that needed to be done and got straight to taking care of this fence before anyone else got hurt. It took hours and hours of back-breaking, hand-killing, I'm still soar the next day work. It's all down and out of the field but our yard looks like a I'm showcasing some sort of red-neck art installation.

I was trying to clip the fence at each post, but so many of the posts were rotten off at the bottom they broke when I tried to get the fence off them. These got rolled into the fencing so I removed the whole thing from the field in 4 big chunks. Plus digging out the 3 pieces of re-bar holding up extra fencing in the ditch between paddocks (I understand why those were there, but an extra long T-post would have gotten that job done better & safer!). I also got the last of the galvanized wire off the bottom line around the paddock, it was still in good (tight) shape, but we weren't using it.

For the winter we've got one big pasture, which is just fine. It was about time for the horses to start coming into the barn for meals (need to do that so I can change blankets when it's cold) and the only time I was splitting up the animals was to feed Maddie anyway. I'd still like to confine the cows in a paddock over winter, so they don't damage the grass; but based on what I've seen at other farms, cows don't really stray from the warm barn unless forced once snow hits the ground.

Meg is all cleaned up now, took some coercion on my part (not a fan of spray-things), but relatively painless all around. If the wound had been any deeper or I had found it sooner it would have been a vet call to close it all the way. As it was the wound was already mostly closed and had stopped bleeding (she probably did it overnight). She's also mostly sound on the leg and still running around like an idiot just in case the vet does come. So I sprayed some Iodine to keep it from infection and applied a liquid bandage for livestock (the silver) to keep it closed.

Flashy Girl!
I could have wrapped the wound but I know the goats/Meg would have taken that off very quickly so this was a better option (plus I'd have to catch her twice a day to change the bandage, eating up time I don't have). I would cold hose it but we've had a big temp drop in the last few days so that is already keeping the swelling down. Hopefully it will close and heal just fine, although she'll probably have a little scar where the biggest part of the wound is. Keeping her outside, and all the blood flowing through the leg as she moves is the best thing to do now that it's covered. I'll be keeping a really good eye on her leg for the next few days, watching for swelling, oozing, and if I'm going to need to reapply the bandage (if we do get either, I'll have the vet out for antibiotics).

We're definitely keeping the liquid livestock bandage in the first-aid trunk from now on. It wasn't cheap ($20 for a small can) but the amount of time/wraps it's going to save me, it was definitely worth it!


Thursday, September 8, 2011

The new feed room

After their last break-in to the feed bins we had to do something to keep the goats out of the feed. It costs us money in spoiled/spilled feed and it's very bad for the goats.

So we converted the old grain room into a tack/feed room. I don't know why I didn't think of this sooner!
As with everything else, it was a big job. Still filled with lots of junk and old feed, had to clear that all out so we could use this space.
The best part about the old grain room is that is that the room is covered in steel all over the walls to keep the mice out! So I now have a mouse-proof feed/tack room!

This was not as dirty of a clean up as most of the other spaces. The old feed was easy to remove. The wood siding that was placed on the floor, thankfully, wasn't covering anything up! I think they just put it down because it is slick & easy to move the feed over.
Some of them did, but we're
not sure all these windows came
off the house

We are keeping all these old windows to re-use them into a recycled window green-house in the future! Very excited for that project, but it probably wont' happen for quite awhile.


The grain chute
We're going to try and put a door into the main part of the barn in the back of the feed/tack room. That was you don't have to walk through the snow/rain when feeding. 

Because it was our project, when repairing the side of the wall here, we went to 'well this is great, but how can we make it awesome?' and hubby installed the window. It looks into the loft, so we don't get too much light, but just enough that you can see to feed without turning the light on.

Hubby still has to do the electrical, we'll have a few lights and some plugs. I don't think we're going to be able to insulate because of the amount of space, but I do have plans for paint. Including adding a painted on black-board to one side.
Still lots more work to do to organize the feed/tack; but for now everything can have a place (which makes me very happy) and the goats can't get into the feed any more!

The goats are not pleased.

Wednesday, September 7, 2011

The Loft


The purpose of a loft in a barn is to provide storage for hay and straw. If you aren't going to use it for storage, leaving down some old hay or straw will provide a nice thick layer of insulation for the horses underneath.

When this is a bad idea, is when you've let the hay build up over 2', and over time small leaks develop in the roof. So the now the wet hay/stray is holding all that moisture against the very old boards; and the boards all start rotting out.

I am terrified of heights
This was NOT fun
In the back corner, you can see
how rotten the boards were getting
The way to fix this is not by throwing more boards on top of the old ones then piling more hay/straw on top.

This resulted in a month long job for me, removing the old hay and repairing the boards. For reasons I can't understand, none of the boards were nailed or screwed down. I'd love to hear from anyone who has any idea why this might be. I used 3" deck screws to attach every board to every single support beam it went over top of.
Still needs some clean up
but so much more open!

Most of the reason I wanted to remove all the hay/straw was so that I could make sure there was something sturdy to walk on, but also to improve air quality in the barn. All that very old hay/straw was very very dusty and was holding a lot of dust and spider webs against the ceilings in the barn. I've improved the air quality a great deal in the barn, but we'll have to wait and see how cold it gets. If we find it's too cold I'll move firm bales up onto the loft and perhaps in the future we'll spray-foam.


Only half-way done
I have left some gaps against the very end of the barn, mostly because I ran out of usable boards, partially for the air-flow and to make this low part of the barn feel as open as the front does. The entry way into this part of the barn is already very small and squishy (really it's too small to safely move a horse through), by removing the loft above it, that whole area feels much less claustrophobic. I do need to build a bridge of some sort in the loft so I can get from one half to the other.

About 80% of what came out
of the loft
We're still going to use all the old hay/straw from up here to bed the goats for the winter. Especially after being thrown down below most of the dust has separated. I removed any wet/moldy bits, but mostly it was just the wood that was rotten, not the hay/straw.

I wore a good quality respirator to clean all this up, very important since you can get round-worms by inhaling dust from raccoon poo. Also because of all the dust and mold from the hay being here for years and years. I only chose nice sunny days when all the animals were outside, which also meant it was stinking hot up there!! And I didn't allow anyone in the barn for any reason with out a respirator as well.

At the end of the day, I'm pretty darn proud of myself! Worked through my fear of plummeting onto the concrete floor below, and only actually fell through once (not to the floor, I was hanging on at the time). The floor in the loft is still a little precarious, the spans between the support beams are too far by today's standard. I don't think there is a way to fix that so we're going to leave this as a "non-usable" loft.  So happy to have gotten this fixed before winter!
The almost finished loft above the horses
I'm leaving the cow-side for next year.